Note: I have an update to this post! If you’re interested in learning more of my later experiences with a split keyboard, check it out here.
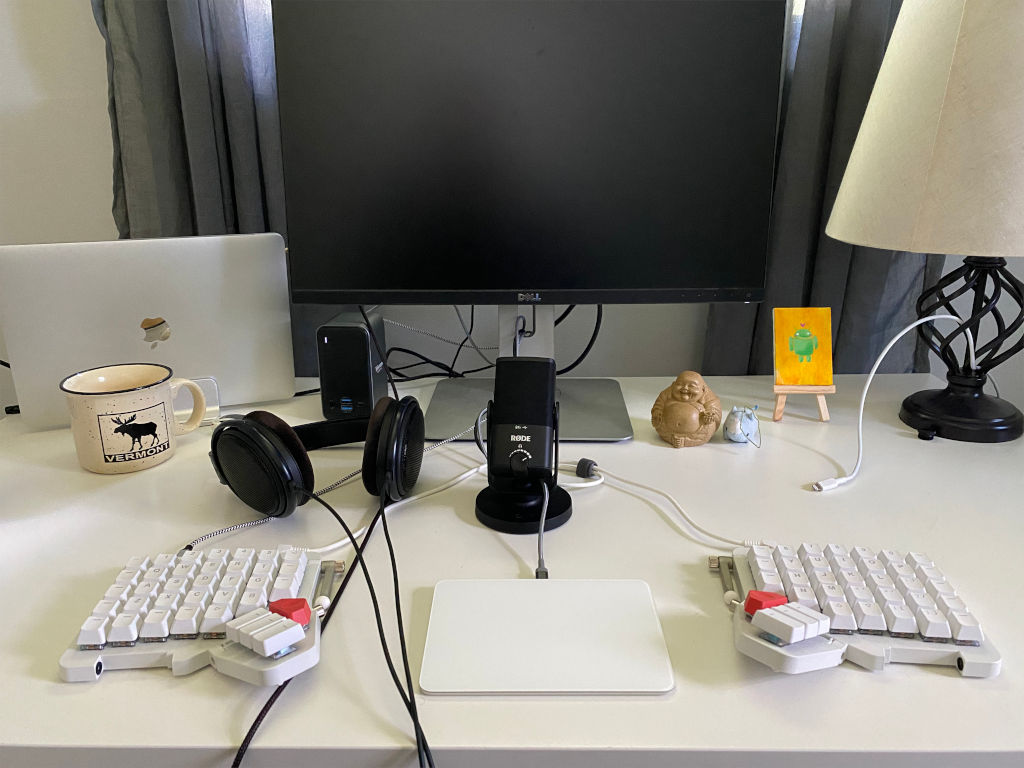
Since I sit at a desk for so long each day I want the experience to be as comfortable as possible. Keyboards are the primary way I interact with computers, and I’ve had a number of them over the years. Some big, some small. Some mechanical, and some not.
I started just working off of a laptop eventually moved to my first mechanical keyboard. A (long discontinued) monoprice mechanical keyboard with MX blue switches. The monoprice keyboard was a solid intro, and made me start looking into mechanical keyboards. I ended up buying myself a nicer mechanical keyboard to try out a bunch of others over the years. Giving the monoprice one to my mom (who now will use nothing but MX blues).

Throughout this journey I’ve tried a number of different layouts, switch types, keycaps, and manufacturers. I even soldered my own up with the second one in the above photo before I learned you could just get a hot-swap PCB and save so my time and effort.
During this entire time I certainly found mechanical more satisfying to type on, but was it the best for me to type on?
After long days of work I found my shoulders were particularly tight and I was getting quite uncomfortable. I started stretching a little, but wanted to figure out why this was happening.
Common themes you’ll see when typing on a regular keyboard is either you have to lay your arms flatter against the desk so your arms can reach inward to click the keys or you have to have your shoulderblades jut out while while pulling in your forearms inward so you can click the keys.
A standard keyboard not only accentuates this behavior, but makes deviation from it impossible. And that’s not good. If you’re pulling your whole body inward, you end up leaving your shoulderblades extra tight. That’s not something you want to do for an extended period of time.
In come ergonomic keyboards

Reserved for the weird coworker who has one and it’s also probably all they talk about (I suppose that’s me now).
There is a reason they’re called ergonomic and people who get them (and talk about them a lot) love them. They are very comfortable once you get the hang of typing on them.
Your posture immediately gets better when using one. It is enforced. Your hands are further apart and it makes it harder to slouch. It’s hard to keep your arms tight to your body and there is no need to learn your arms inward while you’re typing. This alleviates immense amounts of stress on the shoulders and neck that may have been there before.
The moonlander
I was in the market for a good ergonomic keyboard realizing it would fix my issues and I stumbled across the Moonlander™ by ZSA. The moonlander is not a cheap keyboard. However for the amount of time I use my keyboard every day, I ended up going forward with it for a couple of reasons.
- The support (both customer and software) is superb
- The community is huge
- It has ortholinear keys
ZSA seems to pride itself on its good customer support and their willingness to help. When I ordered the keyboard they even recommended I say hello! I did and support responded in less than an hour. Wow! I’ve heard a lot of good things about the customer support, so my little hello is more than the only evidence I have.
ZSA also provides high quality, braindead easy to use software for configuring the keyboard (which they do recommend doing). After using terrible configuration software for years with my igk68, this was a breath of fresh air.
The community is so large too, so if you have a question, ask and it shall be answered.
And the last point is that the keys are ortholinear. For folks who do not know the difference:
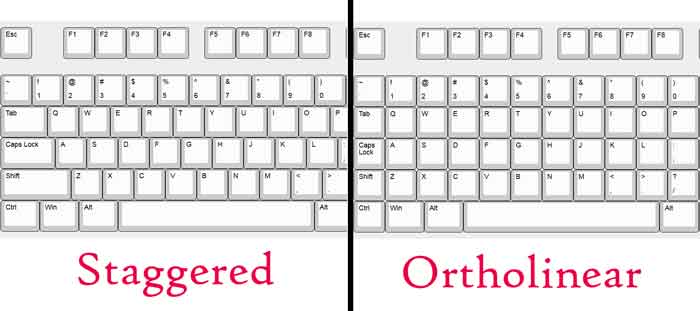
Ortholinear keys just end up making more sense in terms of typing. Staggered layouts are neither ergonomic nor make any sense mechanically now that we’ve moved along from typewriters. Like skeumorphism, they are a relic of the past. We have the technology to move away to use the superior layout now, so we might as well!
Ben Vallack has a great quick video on the differences between the two here.
If you want an ortholinear AND ergonomic keyboard and would rather not build it yourself, the two main options are the Ergodox EZ and the Moonlander. Both of which are excellent keyboards made by ZSA.
I’m 26 and at this point feel like a grumpy old man. I’ve used Linux as my main OS for over 10 years at this point and just want things to work without thinking. I recently bought one of those shiny new M1 Macs as my main computer (would recommend) and in the same spirit, did not feel like cobbling together a keyboard of my own. And so we are here.
The authentic moonlander experience
Starting out if you’ve never used ergonomic keyboards AND you’ve never used ortholinear keyboards, using it is going to be BIG change. I underestimated it a little and got very frustrated when I started. I’ve used keyboards for a long time and can type upwards of 100wpm on a good day, so when I hit 5wpm when I first started, I was quite frustrated.
In fact, I got so frustrated that my hands would tense up when I missed keys. This was not good for my arms and it initially caused a wrist pain I had never experienced before while typing. I almost considered returning the moonlander at that point.
That’s not how I do things though, and I wanted to see things through before I seriously considered sending it back. Two weeks later and I can say I am a fan! No pain and much better posture. I type at roughly 70-80wpm right now and can confidently say I’ll hit 100 again by the end of the month.
After the trials and tribulations, if you have the patience to use it a little after work every day, I can totally recommend it.
Customizing the moonlander
The moonlander has a default layout that works, but it is hot garbage. ZSA recommends customizing it, and I understand why. After changing and relearning the layouts a few times, I’ve found one that is both comfortable and ergonomic enough, while at the same time leveraging much of the previous experience I have gained while typing.
Direct link to my configuration included here as well.
NOTE: I’ve updated my layouts! Updated layout details can be found in a followup post here.
Layer 1
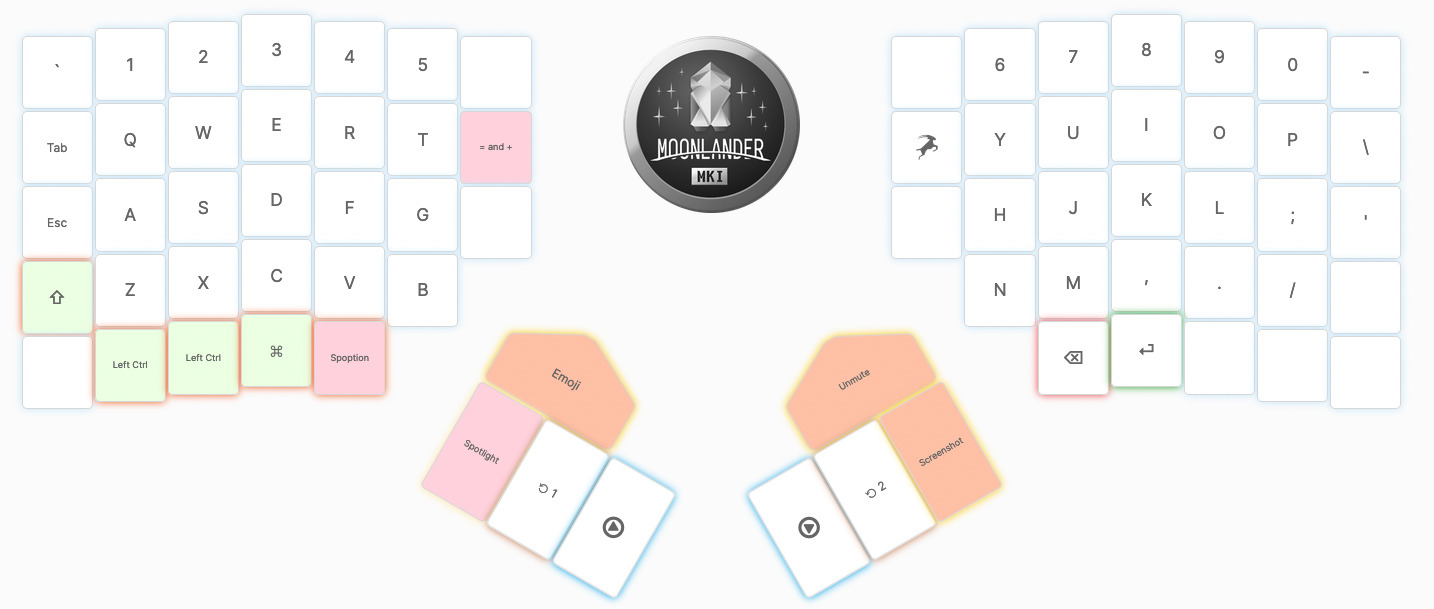
This is the first layer, and it’s both a comfortable blend of new and old. Some notable things about this layout:
Shift stays on the left despite much of my trying to move it somewhere else. For some reason it is very hard to remap this in my brain. Any time I move it elsewhere, my typing slows down a lot and my hands feel weird. So I guess it will go there.
Spoption is space and the option key on one key. Hold for option, press for space. The delay is a little annoying (for both pressing space and holding for option) since they are both used quite often, but the actual location of the two keys is quite comfortable. Perhaps I’ll lower the delay on this key.
= and + are both on the right side of the left hand since there wasn’t much other place to put it. Hitting shift and = is a little annoying, so a short hold on the key will invoke a +.
The two largest and actually the most comfortable changes are enter and backspace on the bottom row of the right hand. I always used to say: those youngsters with their split spacebars make no sense! And yet here I am. They are both extremely comfortable to hit and did not take much time to relearn. Would recommend.
The moose on the left side of the right hand is the Oryx key in case I want to take advantage of the functionality the configurator tool provides for hotkeys or auto-configuration.
Escape goes exactly where it’s supposed to be.
If you notice, you’ll see I don’t use the thumb clusters for much other than quick macro type keys and layer changes. I’ve found the thumb clusters are a little further than I’d like them to be even with the keys tented up. So I reserve them for “special” keys.
Layer 2
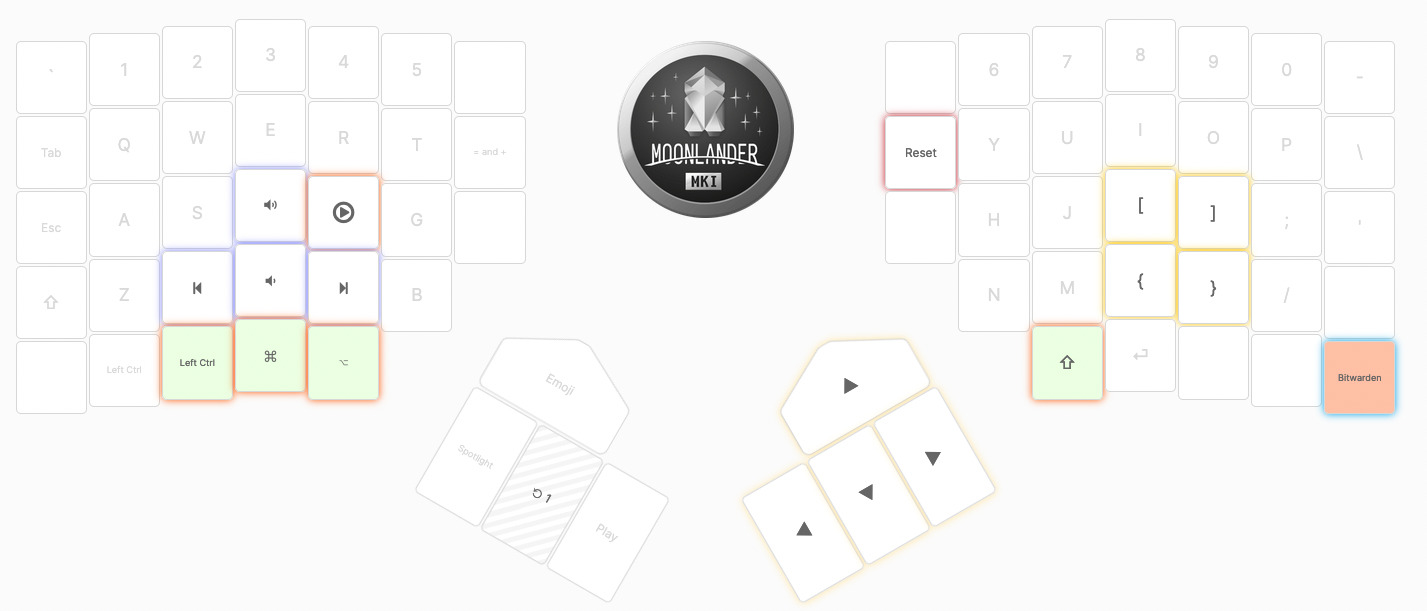
Layer 2 is for media and more. On the default moonlander layout the curly brackets and braces are on the bottom right of the first layer. These are terrible to press. On the second layer though they aren’t too bad!
The thumb cluster is also super conducive to adding real arrow keys! I like arrow keys to be in the “arrow” layout despite living and breathing in vim. So being able to slap them around in their regular layout is nice.
Otherwise there’s a little key for bitwarden autofill and a reset key in case I need to flash new firmware. Simple and easy to remember. The easily configurable colors help a lot too!
Layer 3

The f keys have to go somewhere. Even though vim is able to be more expressive than any modern IDE without f keys, modern editors just can’t seem to find enough keys for basic stuff. So here we are.
Otherwise the moonlander provides some cool keys for “using” the mouse while typing straight from the keyboard. I only use it a little since I already use vimium in the browser, and otherwise the very excellent (and also very expensive) Apple magic trackpad.
It’s nice to have the option though!
Wrapping up
With this layout I feel reasonably comfortable and yet am able to leverage my decades of experience at the same time. I’d say I recommend it to everyone else too, but if you get a moonlander, make sure to tailor it to you and you alone.
Happy typing :-)
Addendum
Hey! If you enjoyed this post, you might like the followup one here where I discuss more of my longer term thoughts.
As always, happy typing :-)